How To Clean a Boat Engine After Salt Water Use (6 Steps)
Even though sailing in salt waters is a highly coveted experience, taking your boat out to the sea or ocean can significantly damage your vessel’s structural integrity and longevity. One of the components that will suffer the most if left unattended for too long is the engine itself. For this reason, not only is it crucial to clean your boat and its motor immediately after salt water use, but it’s arguably even more important to know how to do so properly.
Here’s how to clean a boat engine after salt water use:
- Choose the right boat engine cleaning materials.
- Rinse the entire boat.
- Flush the boat’s engine of salt water.
- Clean the engine’s exterior.
- Make sure the engine dries off completely.
- Take preventative measures.
As long as you follow these simple steps, you’ll be able to enjoy your boating experience with absolute peace of mind. Therefore, keep reading to learn more about the best way to clean a boat engine after salt water use.
1. Choose the Right Boat Engine Cleaning Materials
The first step to properly cleaning a boat engine after saltwater use is to find the right cleaning materials. Choosing the proper boat soap and brush can affect the process’s efficiency more than you’d think, as finding sturdy and effective materials that aren’t too strong or corrosive can often be challenging.
For example, when choosing a cleaning brush, I’d recommend going for an option whose bristles are not too firm, as otherwise, you’d risk scratching and marking your engine’s exterior. Instead, opt for an alternative that offers a soft-medium scrub, as you still want to ensure the tool is strong enough to get rid of any residue.
Ideally, you’ll also want to invest in a soft microfiber cloth that could help you finish off the process effortlessly. Use this gentler cloth to give the engine a final cleaning in an attempt to get rid of any residual detergent or debris.
Speaking of detergent, when cleaning a boat engine, it’s crucial to look for a solution that’s specifically made for said purpose. Otherwise, you’ll risk getting a product that’s either too harsh or too gentle, and both scenarios could lead to considerable damage when it comes to an engine’s performance and longevity.
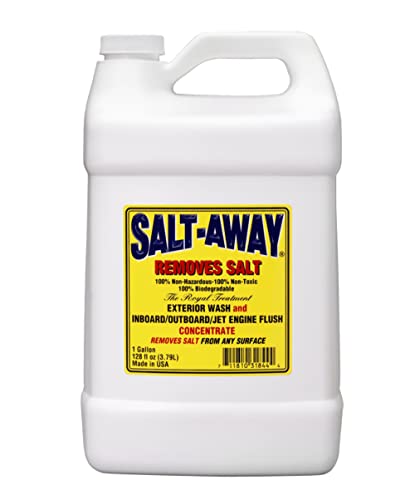
Luckily, there’s no shortage of affordable, high-quality boat soaps on today’s market, and this Salt-Away Products Cleanser Concentrate (found on Amazon) is proof of that.
The brand offers an all-inclusive boat cleaning kit, which you can use depending on your preferences. Their solutions are strong enough to fight and prevent salt corrosion while being gentle enough on your engine to be used as frequently as you’d like.
Not to mention this specific cleanser is one of the most affordable options on today’s market as far as boat soaps go. Due to the fact that this is a concentrate, you’ll need a relatively small amount of solution for each clean, making this a highly economical choice for those wanting to take their vessel out on open water rather frequently.
Make sure to follow the manufacturer-issued instructions to learn more about the specific amount and approach you’ll need to implement for your vessel.
No matter the price point or brand of boat soap you’ll ultimately go for, it’s crucial to give the product’s ingredient list a thorough read first. Doing so will allow you to make sure it doesn’t include any substances that might remove wax or other types of protective layerings that are often applied to your engine’s hull.

2. Rinse the Entire Boat After Salt Water Use
Now that you’ve gathered the necessary materials, it’s time to give your entire vessel a clean, focusing your efforts specifically on its motor. This might seem like a lengthy and unnecessary process, but it’s crucial to ensure that the environment around the engine is just as clean and salt-free as the equipment itself to avoid possible corrosion or other types of structural damage.
Not to mention that other boat components can also suffer from saltwater exposure, which is why giving them a proper clean first might help you achieve a better end result overall.
As I briefly mentioned in one of the first paragraphs, it’s vital that you think about cleaning your vessel the second you return from your saltwater excursion. The best way to start the process is by giving the entire boat a thorough rinse using exclusively fresh water.
I understand that after a long day of sailing, you might be tempted to call it a day and rush home for a good night’s sleep; however, it’s in your best interest to get the cleaning process done as soon as possible. The reason for this is two-fold.
First of all, salt can be much more corrosive than you’d think, meaning that by extending your vessel’s exposure to it even for a few hours, you’ll be risking severe structural damages down the line.
Secondly, rinsing your boat right as you dock is a way more practical cleaning approach. Those who already have some experience with salt water know how drastically it can change the components of your boat in both strength and texture after being left to dry for a few hours.
Dry salt water can be exponentially more difficult to wash and get rid of, as the salt molecules will have hardened (due to moisture loss) and become stuck to the vessel’s surface. Therefore, I’d highly urge you to take advantage of the convenient timing and rinse the salt water away while it’s still fresh.
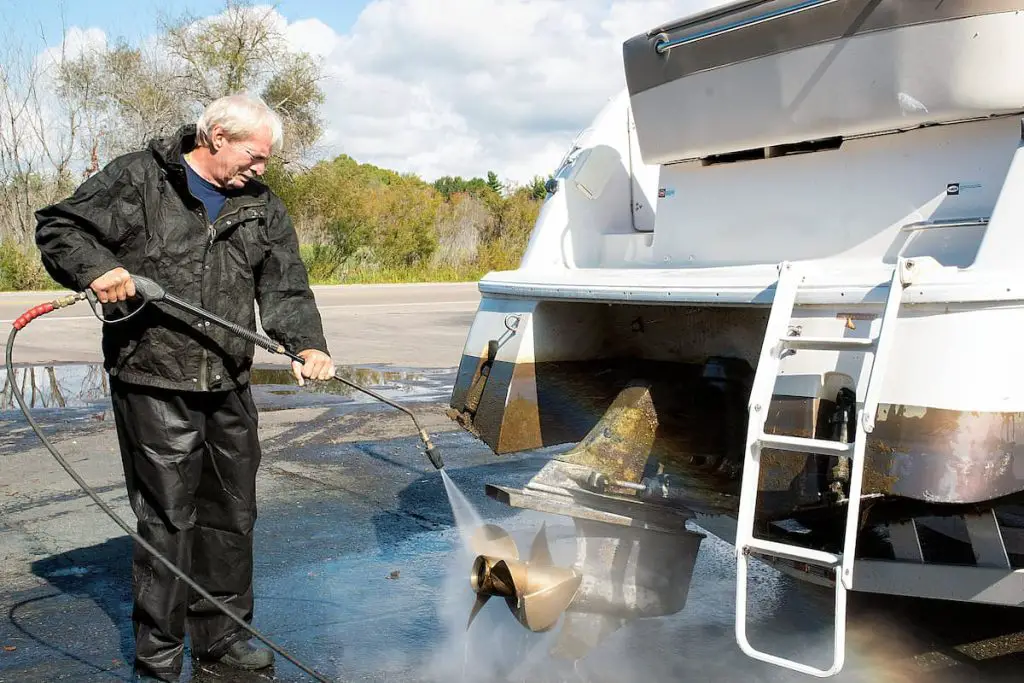
Luckily, the rinsing process is neither challenging nor time-consuming. All you have to do is hose down your boat (with the highest pressure setting your equipment allows) using fresh water and the recommended soap. This motion doesn’t require any particular precision; however, you’ll want to pay special attention to areas comprised of exposed metal to make sure they’re completely saltwater-free.
For more tips and information on how to give your boat a high-quality rinse, I recommend checking out this guide.
3. Flush the Boat’s Engine of Salt Water
After you’ve gotten rid of the salt residue covering your vessel, it’s time to focus your efforts on the engine itself. Given that the equipment is made out of mostly metal, attending to its thorough clean is crucial in ensuring its longevity.
Even when rinsing using the highest-pressure hose and the most effective boat soap, there will still be some areas and crevices you can’t reach, which is why taking the time to flush the motor individually is necessary.
The smallest traces of salt lingering in the equipment’s gasket could lead to excessive amounts of corrosion that would impair its overall performance. Not to mention that the whole process will take a few minutes at most, which is why there’s no excuse for you to skip this step.
Using the same boat soap I’ve previously mentioned and copious amounts of fresh water, start going under folds and crevices you might’ve missed during the first rinsing round. As always, it’s crucial to make the most out of your time and try to flush your engine right as you dock; otherwise, you risk going through the consequences I mentioned in the previous section.
Thoroughly flushing your boat’s motor is especially important during colder winter seasons, whose low temperatures interact with salt in a way that could make the equipment freeze and then crack.
The reason why this happens is that when saltwater reaches below-freezing temperatures, it will start making its transition into a solid form. During this process, the substance will expand in volume, putting increasing pressure under the components it’s being stored in.
If this were to happen, you’d often have to replace the engine altogether, which is why taking the time and effort to prevent it from happening in the first place is always a worthwhile investment.
For this reason, you’ll usually want to flush your boat’s engine for at least 10-20 minutes after every salt water use. However, be careful not to leave your motor running on muffs unattended for too long, as you’ll risk a small flood occurring on your vessel’s floor.
Depending on your engine’s size and the amount of exposed metal on it, the ideal flushing time might vary anywhere from a few minutes to half an hour, which is why it might take a few tries before nailing down your cleaning technique.
4. Clean the Boat Engine’s Exterior
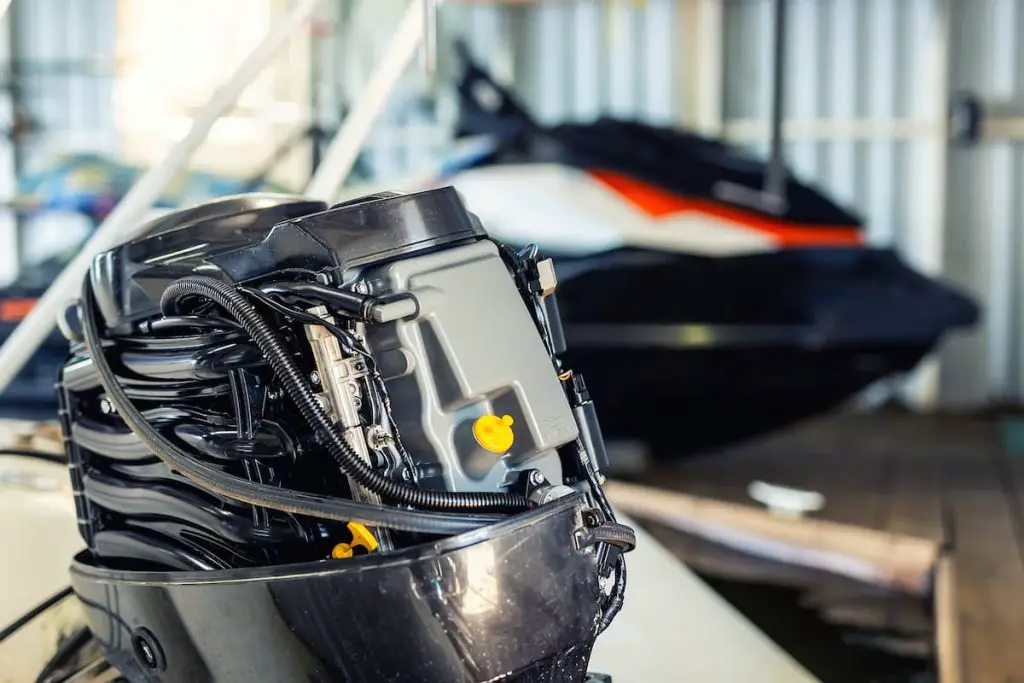
By this point, you’re approaching the end of the cleaning process. Now that you’ve flushed both your vessel and the engine itself, it’s time to give the equipment’s exterior a final, manual clean. You’ll want to take a soft microfiber cloth and wipe any excess detergent or debris off the motor’s surface.
I know that after two consecutive rinses, doing a manual clean might seem like overkill, but getting rid of any possible nicks or scratches might help better preserve the engine’s health and protect the equipment from future salt exposure.
You’ll want to closely examine the engine for any missed spots, scratches, or other flaws that might require your attention. When it comes to dents, you might want to make use of a high-quality primer made especially for metals. Utilize the substance to fill out said dents, and then paint over the area to make the surface uniform again.
This Rust-Oleum Protective Enamel Metal Primer from Amazon is one of my personal top picks. Its oil-based formula provides excellent rust prevention while adding durability and strength to any metal surface.
Additionally, the product’s texture is optimized for quick topcoat adhesion, meaning that you’ll be able to achieve a flawless, discoloration-free end result with every use.
Rust-Oleum has come out once again with a qualitative easy-to-use product. After applying the primer in your preferred area, you’ll want to leave it dry until it’s safe to touch (anywhere from 2-4 hours). Afterward, you’ll be left with a flat, absorbent surface that will take on any paint or top coat you choose to layer on top.
Now that the engine’s exterior is clean and dent-free, all that’s left to do is dry out the equipment completely and take the necessary measures to prevent future damage. Both these steps are crucial in optimizing your vessel’s performance and longevity.
5. Make Sure Your Boat Engine Dries Off Completely
I know that you’ve already invested a lot of time and effort into this process, but you’ll still need to take some time to dry out the equipment to properly finish the process off. Using a squeegee blade, go over the engine’s exterior to get rid of any excess water or residue.
As you may already know by now, excessive moisture can be just as damaging as salt when it comes to your boat’s metal components.
Going through the trouble of giving your engine such a thorough clean and then failing to dry it out properly would defeat the whole purpose of the process. Therefore, although it might seem optional, I’d highly urge you against skipping this step.
6. Take Preventative Measures To Protect Your Boat’s Engine
Now that your engine is spotless, it’s time to attend to some after-care procedures that can help maintain its performance longer and prevent any future damage. This is especially important if you’re planning on taking your boat out on the open water rather frequently, where it will be exposed to salt for extended periods of time.
Here are some preventative measures you can take to optimize your boat engine’s longevity:
- Use a metal polish or vinyl coating. As you’ve probably gathered by now, the metal components found on your boat’s motor are sensitive to environmental factors such as humidity, salt levels, and temperature. Therefore, applying a protective layer of polish or vinyl might make these components better able to handle difficult, corrosive conditions.
- Frequently grease the engine’s components. Extended use can wear out any piece of equipment, no matter how high-quality. Frequently greasing the moving parts keeping your engine running is the most reliable way to allow them to operate for longer. Due to its concentration, salt water can often damage the lubrication keeping these components running, which is why manually greasing them can be crucial.
- Keep UV light exposure to a minimum. Your engine comprises a wide range of plastic and rubber components, which, under direct sunlight, can quickly lose strength and structural integrity. If avoiding UV light exposure altogether isn’t feasible for you, I recommend using a UV blocking solution on your engine to keep its components durable, long-lasting, and damage-free.
Conclusion
Making the time and effort to clean a boat engine after salt water use is an investment that will pay out in the long term. The practice will optimize your vessel’s performance and longevity; however, for the best results, make sure to start gathering your cleaning supplies as soon as you dock.

